Tree Stump Removal: How to Remove a Stump Yourself
That stump sitting in your yard isn't going anywhere on its own, and it's probably costing you more than you think in mowing headaches, tripping hazards, and curb appeal. If you've searched removal stump options, you already know there's a difference between grinding it down, digging it out, or letting chemicals rot it away over a season. Each method has its own tools, time commitment, and price tag, and picking the wrong one for your stump size or soil type can waste a weekend.
This guide walks through tree stump removal the way we'd explain it to a neighbor here in Southwest Florida: what actually works, what doesn't, and how to judge whether a DIY approach makes sense or if you're better off calling in equipment built for the job. We cover the realistic stump removal costs for rental gear versus hiring out, including what affects stump grinding prices, plus the safety issues that trip up most homeowners.
By the end, you'll know exactly how to tackle removal yourself, when a stubborn root system or hidden decay means it's time to bring in a certified arborist instead, and how to get your yard back to usable space without unnecessary expense.
Before you start: how to choose your removal method
Not every stump calls for the same fix, and picking the wrong one wastes time and money. Stump size is the first thing to check: anything under 10 inches in diameter is a realistic weekend DIY job with hand tools, while a 24-inch oak stump usually needs mechanical help. Root depth matters just as much, since Southwest Florida's sandy soil often lets roots spread wide and shallow rather than deep, which actually makes manual digging easier here than in clay-heavy regions up north.
Age of the stump changes your options too. A freshly cut stump still has moisture-heavy wood and tight bark, making it harder to break apart than one that's sat for a year and started to soften. If you're not in a hurry, chemical stump removal products (potassium nitrate-based accelerants) speed up natural decay over four to six weeks, then let you break the rotted wood apart with an axe. If you want the space usable this weekend, grinding a stump down with a machine or manual digging gets you there faster.
Match the method to the stump's size and age first, and the rest of the job gets a lot easier.
Comparing your removal options
Here's how the three common approaches stack up for a typical homeowner project:
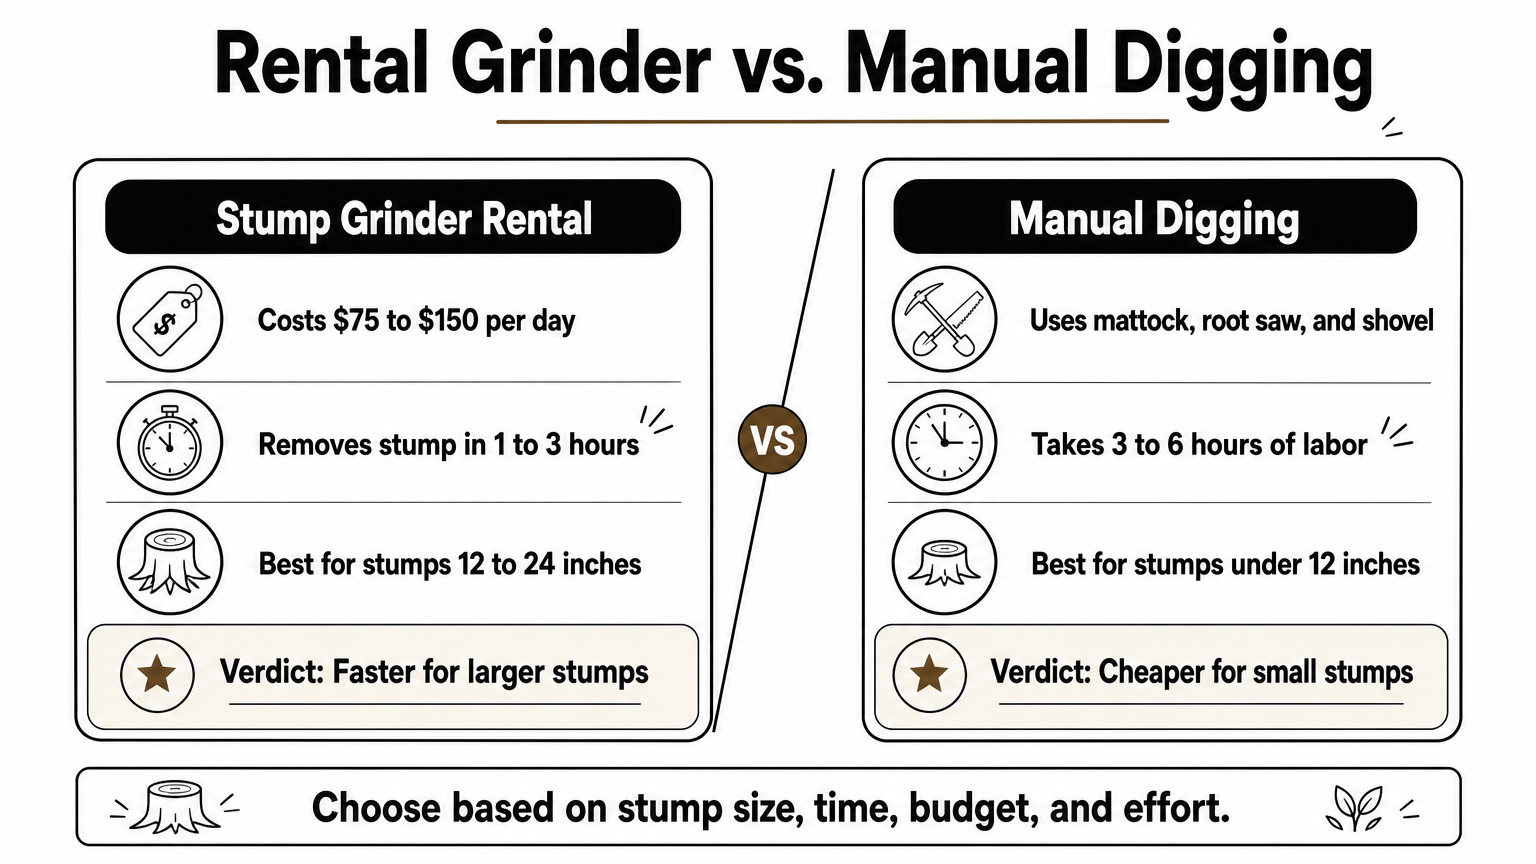
| Method | Time needed | Tools required | Best for |
|---|---|---|---|
| Manual digging | 3-6 hours | Mattock, root saw, shovel | Stumps under 12 inches |
| Stump grinder rental | 1-3 hours | Rented grinder, safety gear | Stumps 12-24 inches |
| Chemical rot | 4-8 weeks | Accelerant, drill, axe | No rush, any size |
| Professional removal | Half day | Commercial equipment | Large stumps, dense roots |
Rental grinders run $75 to $150 a day at most hardware stores, and you'll want steel-toed boots, safety glasses, and hearing protection before you start one up, so it's worth knowing how a grinder works and what the job really costs before you rent. Chemical accelerants cost less upfront, around $15 to $25 a bottle, but they demand patience and won't work well on stumps with extensive live root systems still feeding off nearby trees.
Decay and hidden rot change the calculus, too. If you cut the tree down because it was diseased or storm-damaged, the stump might harbor fungal issues that spread to nearby landscaping if handled wrong. That's a good moment to get an arborist's opinion before you start digging, or to line up a stump grinding company near you, especially if you're unsure whether the root system connects to trees you want to keep.
Step 1. Dig around the stump and expose the roots
Grab a mattock or a spade with a sharp edge before you touch the stump itself. Digging around the base first, rather than attacking the wood, is what separates an afternoon job from a weekend of frustration. Clear a trench about 12 to 18 inches out from the stump's edge, working in a full circle so you expose the root flare where the trunk meets the roots. In Southwest Florida's sandy soil, this trench digs faster than you'd expect, but roots tend to fan out wider than they do up north, so don't be surprised if you're clearing farther out than planned.
Keep the trench at least a foot deep on all sides. Shallow digging leaves you fighting roots you can't see, and that's how shovels break and backs strain. Use a hose to wash sand away from thick roots once you hit them; loose sandy soil sluices off easily and saves you a lot of scraping with hand tools.
Expose the roots fully before you cut anything, since guessing at what's underground is how stump removal jobs turn into all-day projects.
What to have on hand
- Mattock or root axe for chopping through the topsoil layer
- Round-point shovel for moving loose dirt
- Garden hose for washing sand off roots
- Heavy gloves and knee pads
- A tarp to pile dirt on for easy cleanup
Watch for root rot or soft, spongy wood as you dig. Discolored or crumbly roots often mean the tree had disease or stress issues before it came down, and that's worth flagging before you go further. If the whole root ball feels soft rather than solid, you're dealing with more decay than a typical stump, and it may pull free with less cutting than you'd expect.
Step 2. Cut through the roots
Once the root flare is exposed, switch to a root saw or a sharp bow saw for the smaller roots and a reciprocating saw with a pruning blade for anything thicker than two inches. Cutting through the roots works best when you sever the main lateral roots first, the thick ones radiating outward, before touching the taproot underneath. Work your way around the stump in sections rather than trying to cut everything from one angle, since a partially cut root can still hold the stump firmly in place.
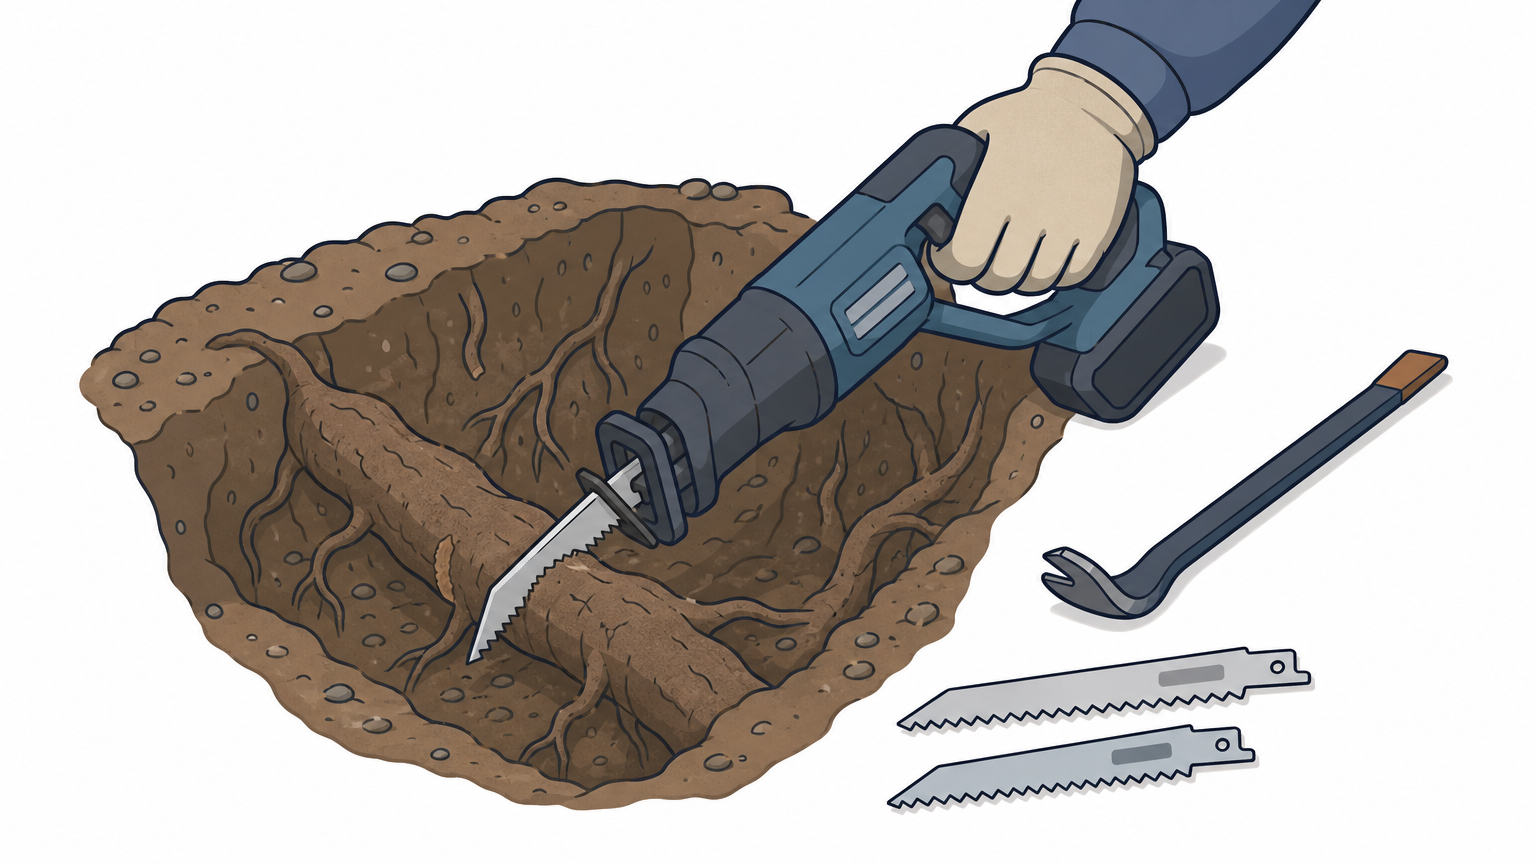
Go slow with any root thicker than four inches. Sandy soil tends to hide grit and small rocks against the bark, and that grit dulls blades fast, so keep a spare blade or two on hand if you're tackling an oak or pine stump. A cordless reciprocating saw handles most Southwest Florida root systems fine, but for anything approaching six inches across, a gas-powered chainsaw with a short bar gives you more control in a tight trench.
Cut the lateral roots before the taproot, and the stump will loosen well before you ever touch a shovel again.
Tools that make root cutting easier
- Root saw or folding pruning saw for roots under two inches
- Reciprocating saw with a demolition blade for two to four inch roots
- Chainsaw with a short bar for anything larger
- Wedge or pry bar to test give as you cut
- Extra blades, since sandy soil dulls teeth quickly
Test the stump's movement after every few cuts by rocking it with a pry bar. If it's still rigid, there's likely a root you haven't reached yet, often running deeper on one side where the original tree leaned. Keep cutting until the stump rocks freely, since that's your signal it's ready to come out of the ground.
Step 3. Remove the stump from the ground
With the roots cut and the stump rocking loose, it's time to get leverage under it. Removing the stump at this stage is mostly about mechanical advantage rather than brute strength. Wedge a digging bar or a heavy pry bar under the root flare on the side opposite where the trunk originally leaned, then push down in short, controlled strokes. The stump should start tilting out of its socket within a few pushes if you cut the roots thoroughly in Step 2.
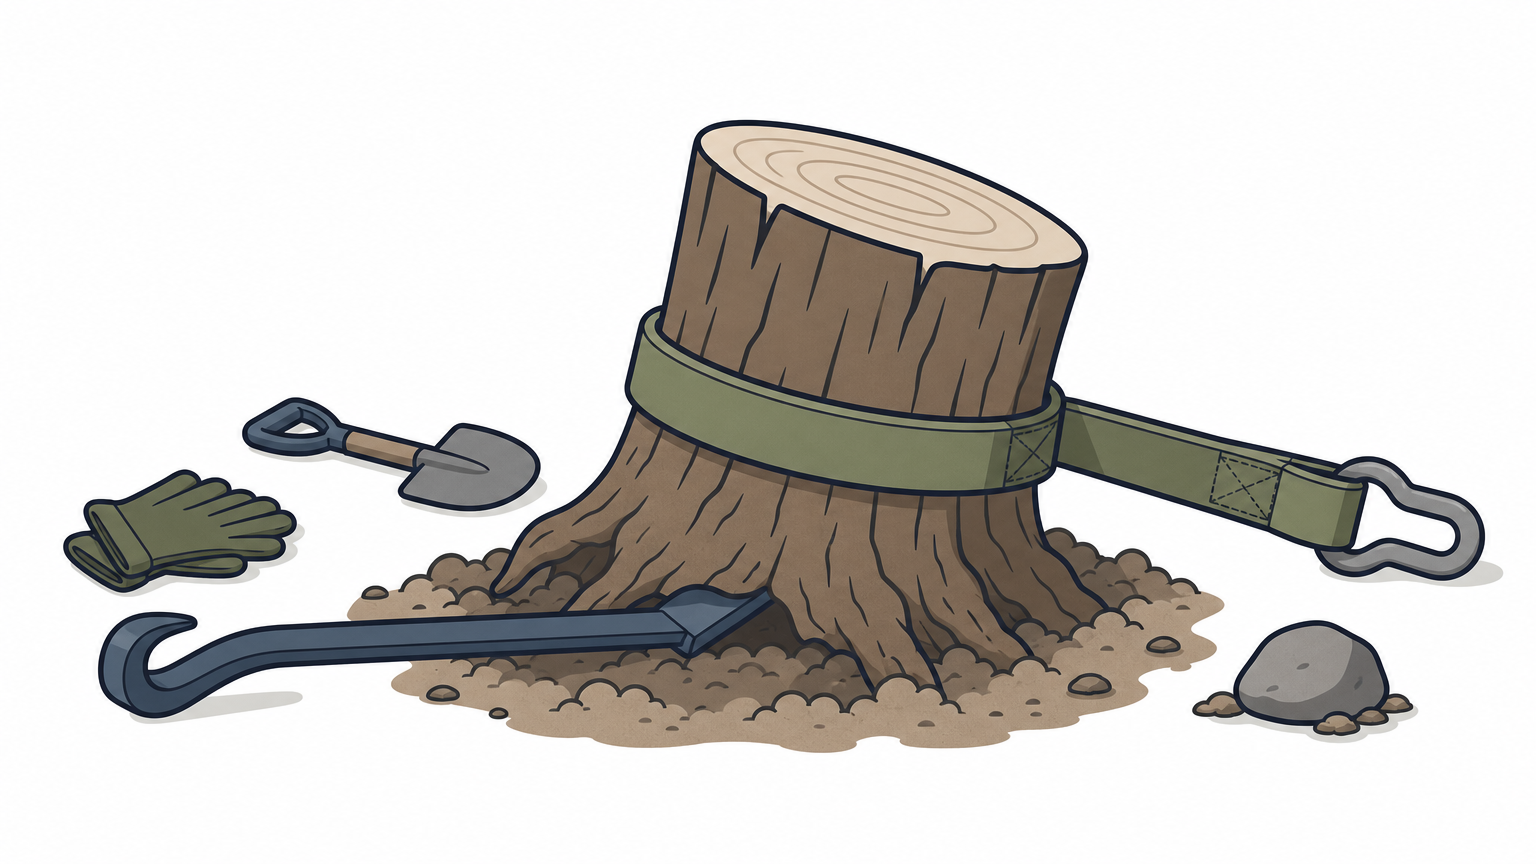
For stumps over 18 inches across, a comealong winch anchored to a nearby tree or truck hitch does the heavy lifting for you. Wrap a tow strap low around the base, run the cable to your anchor point, and ratchet slowly, checking every few cranks for roots you missed. Never stand in line with a tensioned cable or strap; if something snaps, it whips back with real force.
Let the tool do the pulling, not your back, since a stump that fights back usually means one more root needs cutting.
Getting the stump the rest of the way out
- Pry bar or digging bar for stumps under 12 inches
- Comealong winch and tow strap for larger stumps
- Truck or ATV hitch as an anchor point when available
- A helper to watch the cable tension while you pry
Once the stump tips free, roll it out of the hole rather than lifting straight up, especially with wet, sand-heavy root balls that weigh more than they look. Check the cavity for any leftover root fragments thicker than an inch, since those can resprout even after the main stump is gone. This is also a good moment to inspect the underside for rot or pest activity, which tells you whether the tree came down for reasons worth watching in nearby trees too.
Step 4. Fill the hole and prevent regrowth
With the stump out, you're left with a crater that needs backfilling before it turns into a tripping hazard or a low spot that collects water. Filling the hole properly means layering, not just dumping dirt in and walking away. Start with the loose soil you piled on the tarp earlier, breaking up any clumps as you go, and tamp it down every four to six inches with the flat side of a shovel or your boot heel. Southwest Florida's sandy soil settles fast once it rains, so overfill the hole slightly, mounding it an inch or two above grade, since it'll compact down close to level within a week or two.
A hole filled in layers stays level for years; one filled in a single dump sinks into a hazard by the next rainy season.
Stopping the stump from coming back
Some species, especially oaks and certain palms common around Venice and Port Charlotte, where we handle stump grinding and tree care, will try to resprout from any leftover root fragments. Treating the exposed root ends helps shut that down:
- Paint cut root surfaces with a stump-killing herbicide labeled for your tree species
- Remove any root pieces thicker than an inch you missed during Step 3
- Cover backfilled soil with sod or seed within a week to outcompete sprouts
- Check back in three to four weeks for any green shoots and cut them immediately
Grass seed or sod takes root fastest when the fill soil matches your existing lawn's grade, so don't skip the tamping step even if you're in a hurry. If you notice sprouting weeks later despite treatment, that root system may be more extensive than what you cut, which is a sign the removal of tree stump material wasn't complete and might need a follow-up dig or a call to a North Port stump grinding crew with the right equipment.
Getting your yard back to normal
A weekend of digging, cutting, and hauling gets most stumps under 18 inches out of your yard for the cost of a rental and some sweat equity. Tree stump removal doesn't have to mean a big invoice if the stump is small, the roots are shallow, and you've got the time to do it in stages like we outlined above, though it helps to know what stump and tree removal costs and how to hire the right pros. Follow the steps in order, don't skip the backfilling, and you'll have usable lawn space again within a few weeks.
But some stumps fight back no matter how sharp your saw is, especially large oaks with deep taproots or stumps hiding rot that spreads underground. If you hit that wall, or you'd rather skip the labor entirely, get a fast stump grinding quote from ArboBella Tree Service, backed by certified arborist experience right here in Southwest Florida.