Removal of Tree Stumps: Methods That Actually Work
That stump sitting in your yard isn't just an eyesore. It's a tripping hazard, a mower obstacle, and sometimes a launching pad for new sprouts you never asked for. If you've searched for the removal of tree stumps , you've probably already found conflicting advice online, everything from Epsom salt myths to rental-store grinders that jam halfway through the job. Homeowners in Southwest Florida deal with this constantly, especially after storms leave behind splintered trunks that need to come out fast.
This guide cuts through the noise and walks you through the methods that actually work, whether you're tackling tree stumps removal by hand, using chemical accelerants, or bringing in mechanical grinding equipment. You'll learn which approach fits a small ornamental stump versus a stubborn oak root system, and what timeline and effort each one realistically demands.
We'll cover manual digging techniques , chemical decomposition options, and when professional stump grinding simply saves you time, your back, and your yard's soil structure. By the end, you'll know exactly which method matches your stump, your budget, and how soon you want that patch of yard usable again.
What to know before removing a tree stump
Before you grab a shovel or call an equipment rental yard, spend ten minutes assessing what you're actually dealing with. A three-year-old crepe myrtle stump and a decades-old live oak stump require completely different stump removal methods , and picking the wrong one wastes a weekend, which is why it helps to weigh whether the job is a DIY project or one for a pro first. Diameter, root depth, and wood density all determine whether hand digging is realistic or whether you need mechanical help.
Size and species matter more than you think
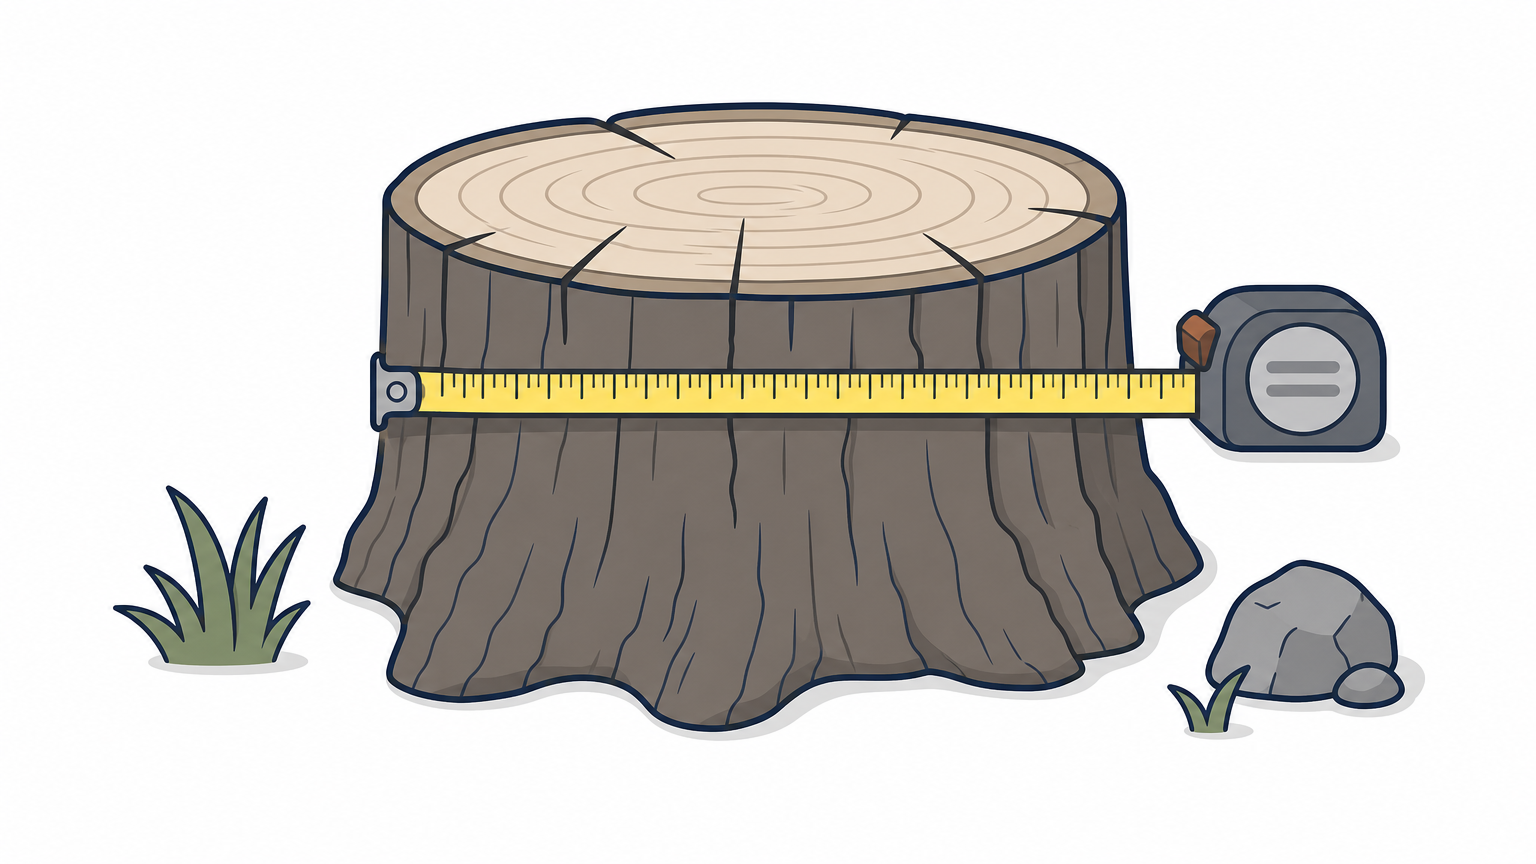
Softwood stumps like pine or melaleuca decay faster and pull apart easier than hardwoods like live oak or slash pine that have been established for years. Measure the diameter at the base. Anything under 10 inches is a reasonable DIY candidate. Past 18 inches, especially with a wide root plate, you're looking at rental equipment or a professional crew.
| Stump diameter | Best DIY approach | Realistic timeline |
|---|---|---|
| Under 10 inches | Manual digging | 1 to 2 days |
| 10 to 18 inches | Rented grinder or digging + chemical | 2 to 5 days |
| Over 18 inches | Mechanical grinding or professional removal | Same day (with equipment) |
Call 811 before you dig anything
Underground utilities don't care how motivated you are. Florida law requires you to call 811 at least two business days before digging, and it's free. Gas lines, irrigation, and buried cable often run closer to stumps than people expect, especially in older Southwest Florida neighborhoods where landscaping has shifted over the years.
Skipping the utility check is the single most expensive mistake you can make on a stump job.
Decide what you actually need: removal or just the surface gone
Here's where a lot of homeowners waste effort. If your goal is a flat, mowable yard, stump grinding gets you there in hours without touching the root system underground. If you need the entire root ball gone, for a new patio or foundation work, full excavation is the only real option. Ask yourself:
- Do you plan to plant something new in that exact spot?
- Will roots interfere with a driveway, septic line, or foundation?
- Is this purely cosmetic, or is the stump sprouting suckers you're tired of cutting back?
Your answer changes everything downstream, from which tool you rent to how deep you need to dig. Skipping this step is why so many DIY stump projects stall out halfway through, once someone realizes they dug three feet down for a problem that grinding six inches would have solved.
Step 1. Dig out the stump by hand
Hand digging remains the cheapest removal of tree stumps method, and it works well for anything under 10 inches across, so it's worth reading the full walkthrough on taking out a tree stump yourself. You won't need special equipment, just patience, sharp tools, and a plan for the roots you'll uncover as you go. Expect a full afternoon for a small stump, longer if roots run deep into compacted Florida sand or clay.
Gather the right tools before you start, because switching mid-job wastes energy:
- Mattock or grub hoe for chopping through roots
- Round-point shovel for clearing loosened soil
- Root saw or bow saw for roots too thick to chop
- Digging bar to pry the stump loose once roots are severed
- Tarp to catch excavated dirt and make cleanup faster
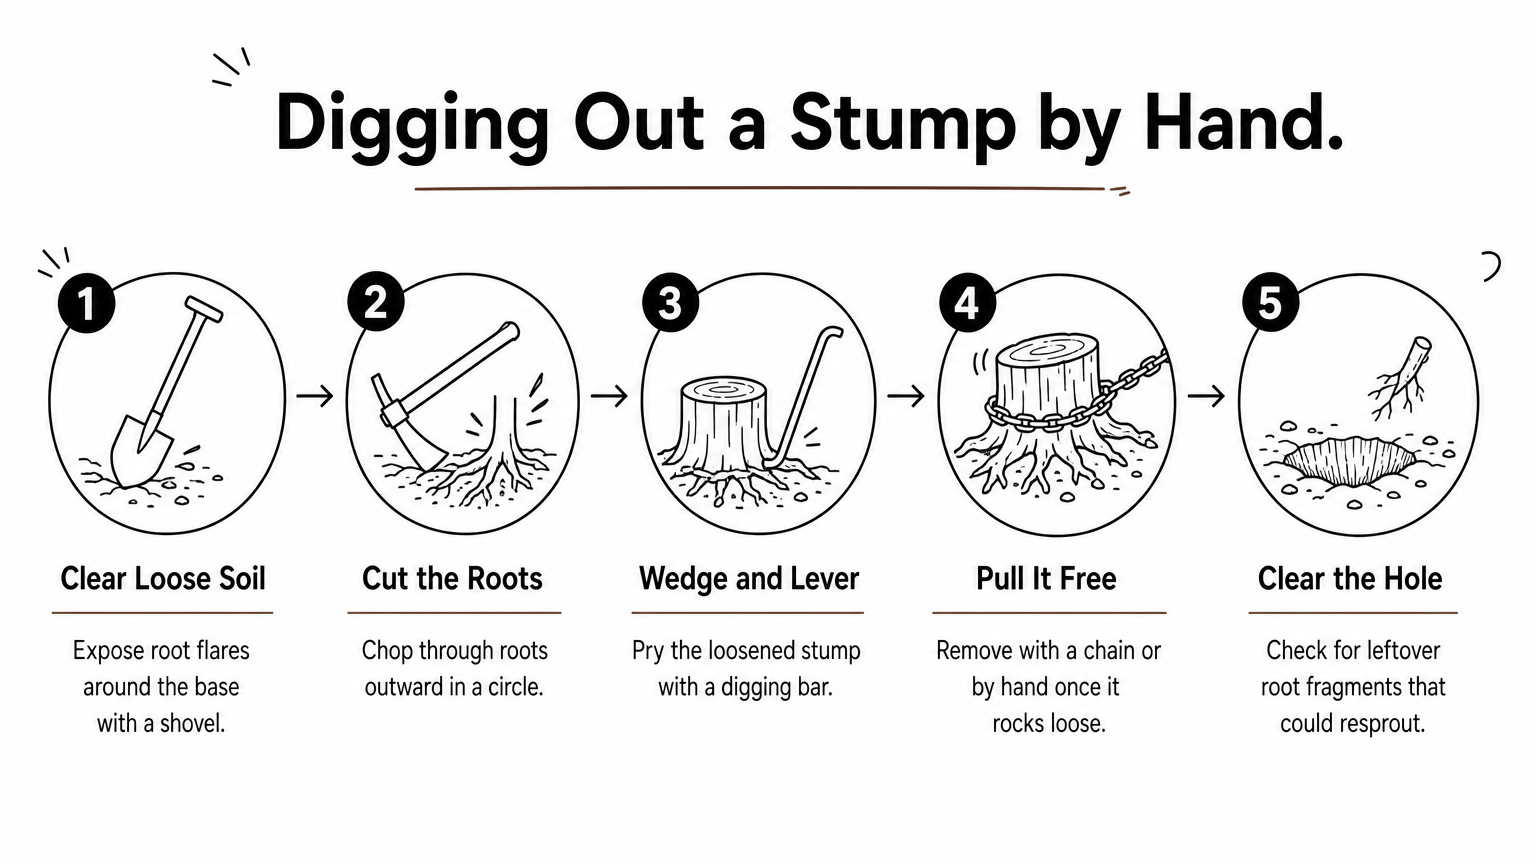
Begin by clearing loose soil around the base with your shovel until the major root flares are exposed. Cut through each visible root with the mattock or saw, working outward in a circle rather than digging straight down. Circling the stump this way keeps you from tunneling blindly and hitting a root you can't see.
Continue exposing and cutting roots until the stump rocks when you push on it. At that point, the digging bar becomes your best friend, wedged underneath to lever the stump upward while you cut any remaining anchor roots below.
A stump that rocks freely is almost always ready to come out, don't force it before then.
Finally, once the stump breaks loose, pull it clear with a chain and vehicle if it's heavy, or lift it manually if it's small enough. Check the hole for leftover root fragments, since anything left behind can resprout within a season.
Step 2. Grind or pull the stump with equipment
Once a stump crosses that 10 to 18 inch threshold, hand tools stop being practical and mechanical grinding becomes the faster route. A stump grinder chews through wood fiber with a rotating cutting wheel, turning the stump into mulch chips in under an hour for most residential jobs, and the order of passes you make with the machine matters as much as the machine itself. Rental units run $100 to $400 per day depending on horsepower, and most home centers stock them locally in Southwest Florida, which is often close to what a crew charges per stump once you factor in your time.
Renting a grinder the right way
Before you rent, ask the counter staff which model handles your stump's diameter, since undersized grinders stall constantly on hardwood, and it pays to understand how the grinding process works before you rent a machine. Bring gloves, eye protection, and hearing protection, because these machines throw debris and run loud. Walk the grinder in slow passes, lowering the wheel a few inches at a time rather than forcing it straight down.
- Clear rocks and debris from around the stump first
- Grind 4 to 6 inches below grade for a mower-ready surface
- Work in a fan pattern, side to side, not straight through
- Shut off and unplug before clearing jammed chips
Grinding removes the visible stump fast, but the roots stay in the ground and can still resprout.
Pulling stumps with a truck or winch
For stumps already loosened by digging, a chain wrapped around the base and pulled with a truck or come-along winch can finish the job without grinding equipment at all. This works best on shallow-rooted species like melaleuca, and it's risky on anything with a wide root plate, since sudden release can snap chains or shift the vehicle. If your goal matches full stump grinding rather than root extraction, ArboBella Tree Service's stump grinding crew serving North Port, Port Charlotte, and Venice brings commercial-grade grinders that handle oak and pine stumps most rental units can't touch.
Step 3. Speed up decay naturally or with chemicals
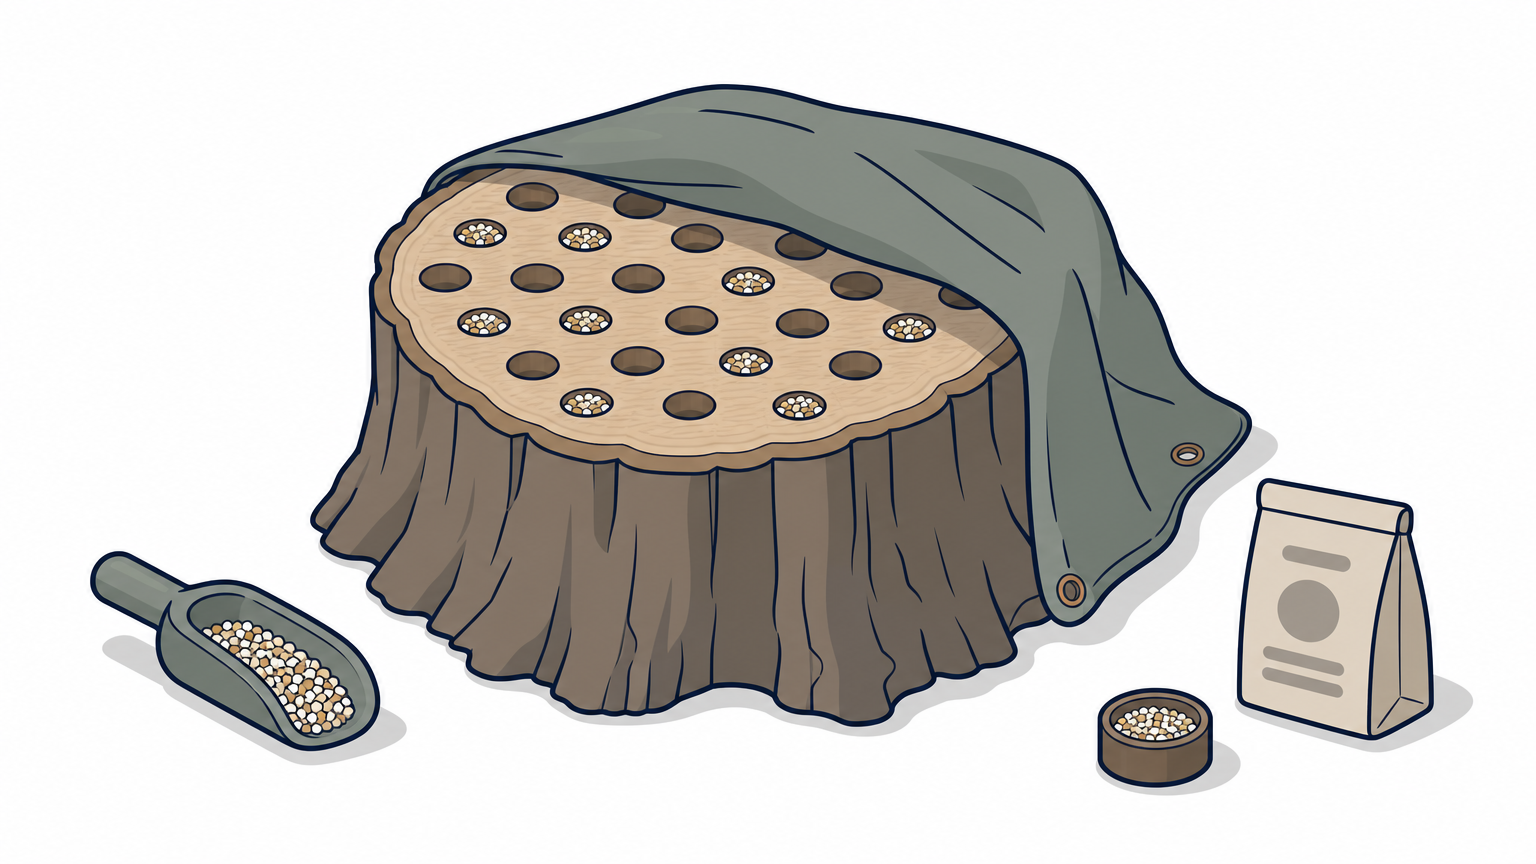
Not every stump needs a shovel or a grinder. If you're willing to wait a season or two, you can let natural decomposition finish the job with almost no physical labor. Drill a grid of 1-inch holes across the stump's top and sides, spacing them about 2 inches apart, then pack them with high-nitrogen fertilizer or plain garden compost. Nitrogen feeds the fungi and bacteria that break down wood fiber, and Florida's heat and humidity actually work in your favor here compared to drier climates.
Chemical stump removers and what actually works
Products marketed for chemical stump removal usually contain potassium nitrate, which accelerates rot rather than dissolving wood outright. Drill the same hole pattern, fill with the product per label directions, then cover the stump with a tarp to hold in moisture and heat. Expect 4 to 8 weeks before the wood softens enough to break apart with an axe, faster in summer than winter.
Chemical accelerants speed up rot, they don't replace the final step of breaking the softened stump apart yourself.
Skip the Epsom salt method you'll see recommended online. It dehydrates surrounding soil without meaningfully speeding up wood breakdown, and it can stress nearby turf and landscaping. Stick with nitrogen-based fertilizer or a labeled potassium nitrate product instead.
When patience beats power tools
Homeowners dealing with stumps in low-traffic areas, side yards, or spots not slated for new planting anytime soon, often prefer this route simply because it costs less and requires zero rental fees. Combine drilled holes with a thick mulch cover, and most softwood stumps collapse enough to remove by hand within one Florida summer.
Step 4. Fill the hole and restore your yard
Once the stump and major roots are out, you're left with a crater that needs proper backfilling, not just a shovel of loose dirt tossed on top. Rushing this step leaves you with a sunken spot that reappears every rainy season as the soil settles and compacts. Take the extra hour now, since redoing a lawn repair later costs more time than doing it right the first time.
Backfilling without leaving a sinkhole
Remove any leftover wood chips or root fragments from the hole before filling, since decomposing organic matter underground causes uneven settling later. Fill in layers, tamping every 4 to 6 inches with the back of a shovel or your foot, rather than dumping all the soil in at once. Mound the final layer slightly above grade, an inch or two is enough, because it will compress down close to level within a few weeks.
A stump hole filled in layers holds its shape, one filled in a single dump always sinks.
Restoring grass or planting fresh
If your goal is a mowable lawn again, spread topsoil over the mound, rake it smooth, and overseed with a grass variety matched to your existing turf, St. Augustine and Bahia both do well across Southwest Florida yards. Water daily for the first two weeks to help seed germination take hold before the Florida sun dries out the surface.
- Remove debris and root fragments first
- Backfill in tamped layers, not one pour
- Mound slightly to allow for settling
- Overseed or sod to match existing lawn
- Water consistently for the first two weeks
If you're planning to plant a new tree or shrub in that spot, wait at least one growing season. Fresh backfill hasn't fully settled, and root decay chemicals or leftover fungal activity can still be present in the soil.
When professional help makes sense
Some stumps just aren't a weekend project. Wide-diameter oaks, root plates tangled around septic lines, or stumps sitting near a foundation call for judgment a rental grinder can't replace. If you've read through every method here and still feel unsure which one fits your yard, that hesitation is worth listening to.
Hand digging, chemical decay, and DIY grinding all work, but each has a ceiling. Past that ceiling, you risk hurting yourself, damaging buried lines, or leaving root fragments that resprout for years. Professional stump grinding clears the job in hours instead of weekends, and an ISA Certified Arborist can tell you whether removal even makes sense versus treating the tree while it's still healthy.
If your stump, or the tree it came from, has you second-guessing the right move, talk to ArboBella Tree Service about an on-site assessment and estimate that fits your property.